
Ben from Ben Makes All the things had an outdated Ender 3 3D printer accumulating mud in his closet. So, he got here up with an ingenious thought: flip this dusty machine right into a cinematic marvel. Extra particularly, a robotic digicam rig to seize easy video and scan objects to create 3D fashions.
Ben’s quest started with a photogrammetry setup, which collects many images of an object from totally different angles and patches them collectively to type a 3D mannequin. His Ender 3 had precision stepper motors and a configurable G-code system. Printers transfer in three axes—4 should you depend the extruder—so why not repurpose these mechanics to maneuver a digicam?

ELEGOO Neptune 3 Professional 3D Printer with Auto Mattress Leveling, Twin-Gear Direct Extruder, Twin Lead Screw Drive,…
- OVERVIEW OF NEPTUNE 3 PRO: 225x225x280mm/8.85×8.85×11 inch printing dimension can meet the wants of most customers. With an STM32 motherboard, all axes of…
- DUAL-GEAR DIRECT EXTRUDER: The brand new direct drive extruder is made from SUS303 high-quality stainless-steel with a 3:1 discount ratio and stronger…
- NOZZLE KIT FOR BETTER PRINTING: The nozzle package accommodates a TC4 titanium alloy throat pipe, an aluminum alloy flat warmth sink construction, and a brass…
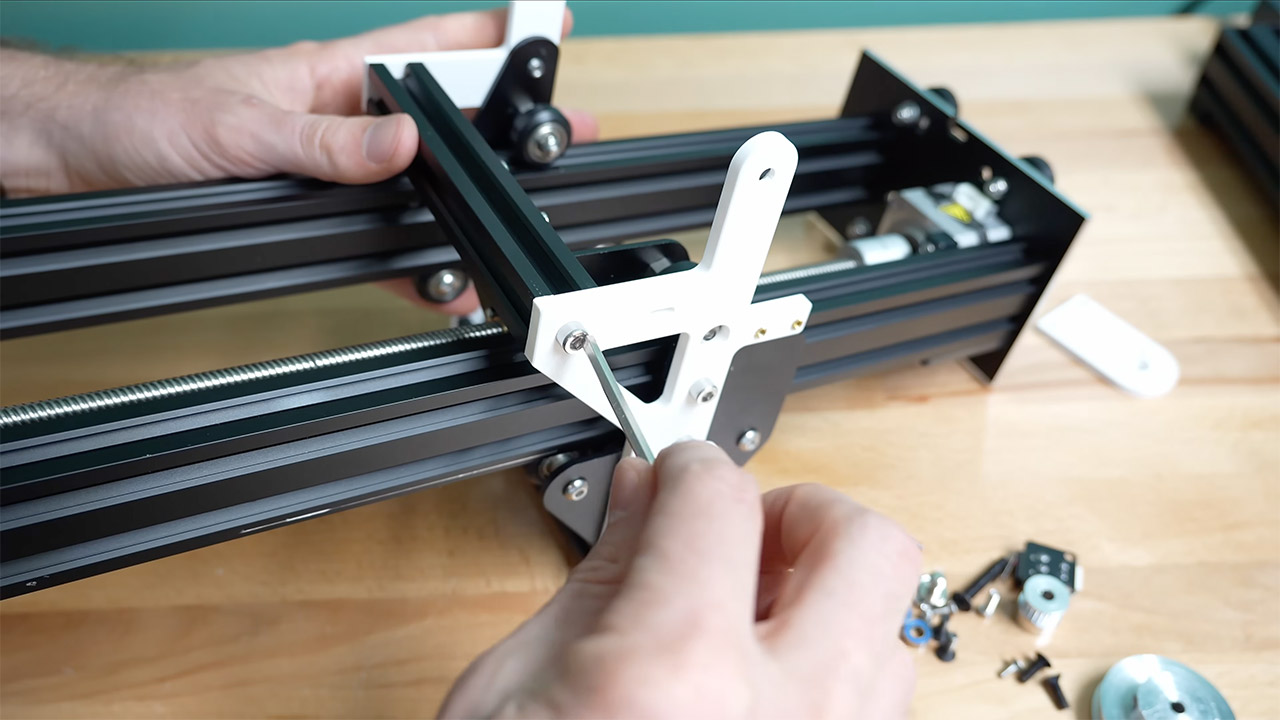
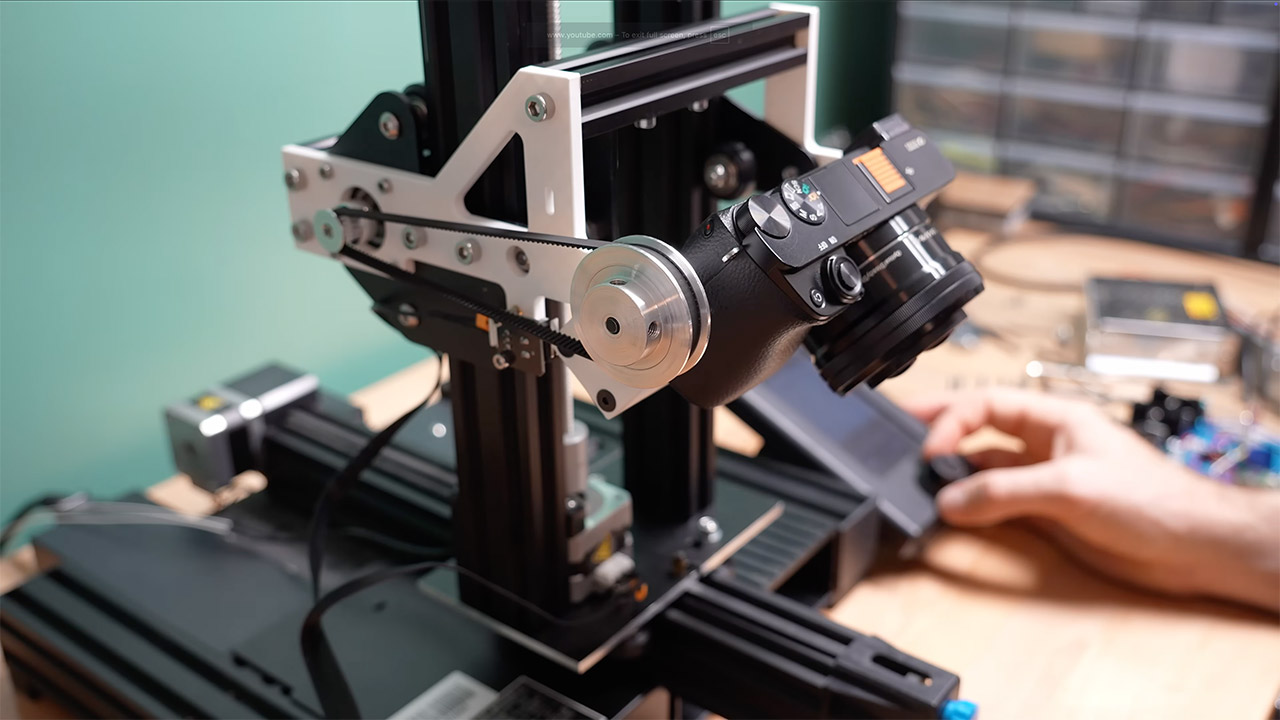
The digicam rig wanted to maneuver in a number of instructions: tilt up and down, slide ahead and backward, and regulate vertically. Ben began with the lean mechanism, initially the X-axis, which moved the print head facet to facet. He designed a U-shaped bracket to carry the digicam and linked a 60-tooth pulley to the motor by way of a smaller pulley for smoother movement and elevated torque. This meant it was capable of tilt a full 180 levels.
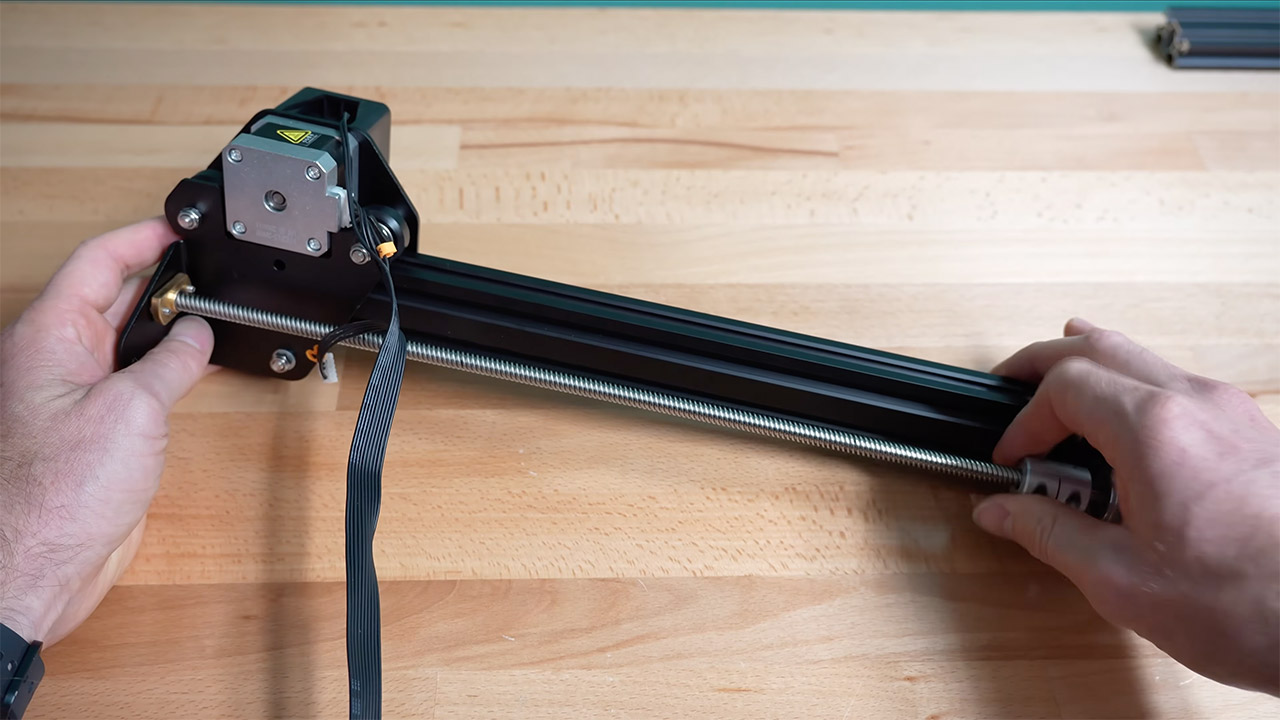
For vertical motion, Ben repurposed the Z-axis, which initially raised and lowered the print head. The Ender 3’s twin 2040 aluminum extrusions have been the tracks, guided by V-shaped wheels and a lead screw pushed by a stepper motor. To deal with bigger objects, he prolonged the Z-axis with longer rails and a brand new lead screw, however bumped into an issue when the brand new screw’s thread pitch didn’t match the outdated brass nut. A simple repair was to drill new holes to mount the proper nut.
The Y-axis, which strikes the digicam ahead and backward, wanted an improve too. The unique 4040 extrusion solely had 220mm of journey – not sufficient for Ben’s wants. He changed it with a 750mm extrusion, and paired it with an extended GT2 belt, lower and crimped with brass bands. The unique tensioning system labored completely. Regardless of considerations concerning the belt-driven system dealing with the burden of the digicam, exams confirmed it labored nice and he didn’t want a linear rail setup.
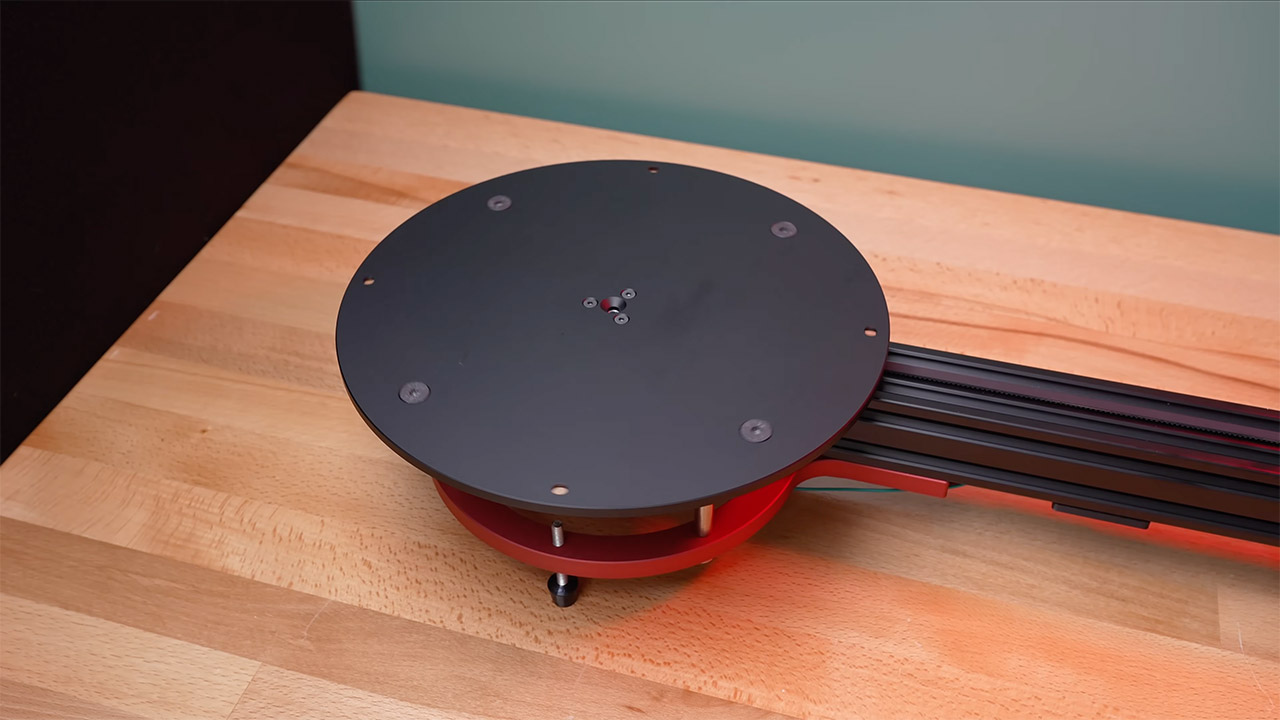
Essentially the most bold a part of the undertaking was the rotational axis. Ben initially deliberate an 18” bearing ring to spin the digicam across the object. He envisioned a protracted metallic arm extending from the ring, holding a motorized cart that might transfer the digicam out and in and up and down. Driving the ring proved difficult – friction wheels would slip and machining a customized inner gear was past his instruments and funds. After some thought, Ben flipped the idea: as a substitute of shifting the digicam, he’d rotate the item on a turntable.
The turntable was powered by the printer’s extruder motor, now repurposed to spin a platform by way of a 60-tooth pulley and a 20-tooth gear. Ben designed a sturdy base with adjustable standoffs and bearings to make sure easy rotation, even beneath the burden of bigger objects. The turntable might deal with as much as 18” in diameter, making it good for scanning home items like vases or small sculptures. So as to add rigidity and polish, Ben had a number of components CNC-machined in metallic by an out of doors service, however famous that prime high quality 3D printed components would work simply as effectively for these on a funds.
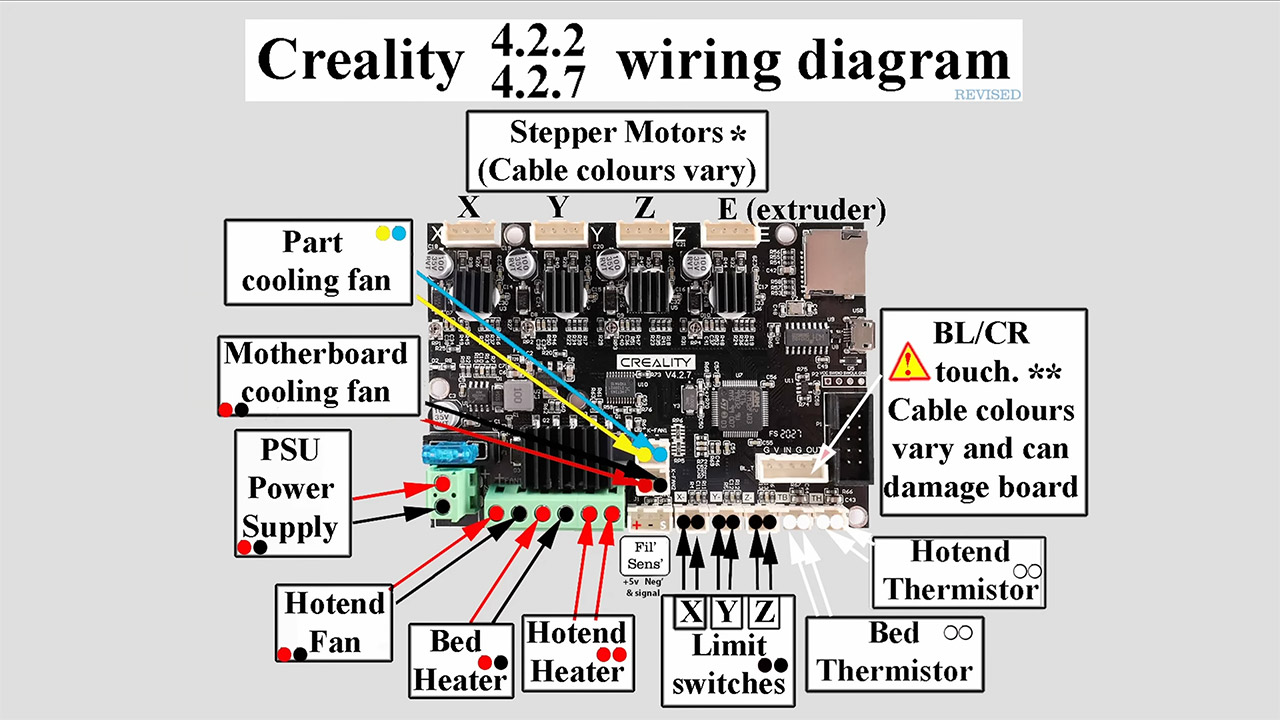
The Ender 3’s mainboard, beneath the printer’s body, had 4 motor drivers – excellent for the rig: X-axis for tilt, Y-axis for forward-backward movement, Z-axis for peak and the extruder driver for the turntable. Restrict switches for exact homing and a micro swap for the lean axis. Ben ran wires to the brand new parts, saved it clear with a cable chain and a customized 3D printed bracket for the management display.
Ben then adjusted the Y and Z-axis mushy limits to match their prolonged ranges and recalibrated the X-axis (now tilt) to forestall over-rotation. The turntable’s steps-per-unit setting gave him a headache – it solely rotated two-thirds of the anticipated distance – till he realized he wanted to clear the printer’s EEPROM with a selected G-code command. For management he used Pronterface, a program that sends G-code over USB or by way of an SD card, and wrote Python scripts to automate actions, particularly for photogrammetry.
Capturing stills for 3D scanning required an automatic shutter set off. Ben repurposed a 5V sign pin from the mainboard’s BL Contact connector, initially for a bed-leveling sensor, to ship alerts to his digicam. To guard his costly gear he used an Arduino and two mechanical relays – one to focus, one to snap the picture – guaranteeing electrical isolation. The relays, overkill for the three.3V sign, added a charmingly sturdy contact to the setup. A 3D-printed field housed the relay system and rubber toes bolted to the turntable prevented wobbling.
The ultimate rig is a beast, taller than anticipated to suit giant objects. It has 600mm of ahead journey, 500mm of vertical motion and 180 levels of tilt, all whereas being easy and vibration free for crisp footage.
[Source]


